
How to Add custom profile fields to BuddyPress User Profile
To add a user field to the user profile using BuddyPress from the WordPress dashboard, you can follow these steps:
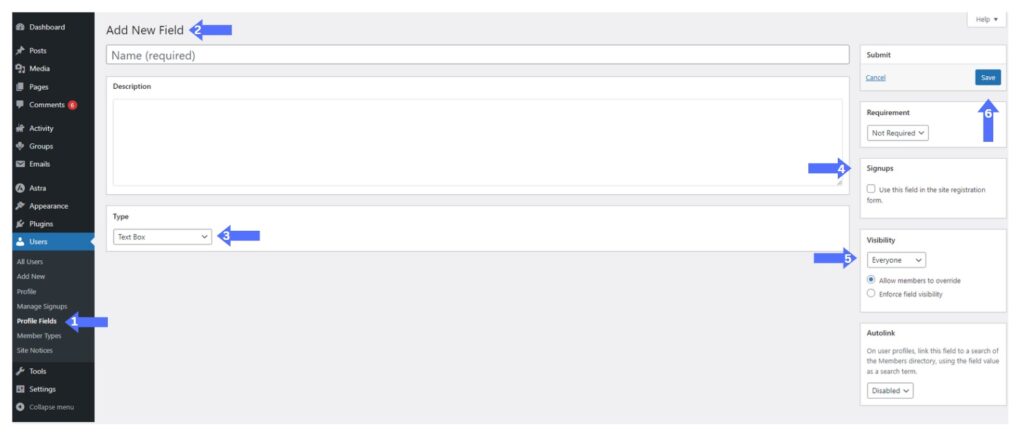
- Log in to your WordPress dashboard.
- Go to the “Users” > “Profile Fields” section in the BuddyPress admin panel.
- Click on the “Add New Field” button.
- Fill in the field information, such as the field name and type.
- Set the visibility of the field, if desired.
- Click the “Save” button to save the field.
The new field will now be added to the user profile and will be visible to users when they edit their profile.
How to Add custom profile fields to BuddyPress Registration
To add a user field to the registration form using BuddyPress from the WordPress dashboard, you can follow these steps:
- Log in to your WordPress dashboard.
- Go to the “Users” > “Profile Fields” section in the BuddyPress admin panel.
- Click on the “Add New Field” button.
- Fill in the field information, such as the field name and type.
- Set the visibility of the field to “Everyone“.
- If you want to make the field mandatory then set the Requirement to “Required”.
- In the “Settings” section, check the “Use this field in the site registration form.” option.
- Click the “Save” button to save the field.
The new field will now be added to the registration form, and users who register for your website will be required to fill it out. Field data can be used to personalize the user experience or to gather information from new users.