Ultimate Member offers tremendous flexibility when it comes to adding fields to their Login, Register & Profile forms. You can add varieties of fields depending on your needs. The good news is you can do that with the free version of the Ultimate Member WordPress plugin.
Want to create a robust social media site? There are many different types of form fields and functionalities that may be available on a social media site. Some common examples include fields for entering a username, password, and email address to create an account; fields for posting updates, messages, or comments; and options for uploading and sharing photos or videos. Social media sites may also offer additional features and functionalities, such as the ability to search for other users, follow or connect with friends, create or join groups, or customize your profile or settings.
The purpose of adding fields to a form is to collect information from users. By adding fields to a form, you can specify the type of information that you want to collect from users, such as text, numbers, or dates. This allows you to gather the information that you need in a structured and organized way.
Ultimate Member offers exactly that. It lets you add 23 types of fields to your form. And it has 34 Predefined fields.
Field Type – 23
- Text Box
- Telephone Box
- Number
- Textarea
- Dropdown
- Multi-Select
- Radio
- Checkbox
- URL
- Telephone Box
- Password
- Image Upload
- File Upload
- Date Picker
- Time Picker
- Rating
- Content Block
- Shortcode
- Spacing
- Divider
- Google Map
- Youtube Video
- Vimeo Video
- SoundCloud Track
File Upload Field Type
- CSV
- DOC
- Text
- DOCX
- ODT
- ODS
- XLS
- XLSX
- ZIP
- RAR
- MP3
- PNG
- JPG
- JPEG
- GIF
- EPS
- PSD
- TIF
- TIFF
Predefined Fields
- Username
- Username or E-mail
- Password
- First Name
- Last Name
- Nickname
- Website URL
- Registration Date
- Last Login
- E-mail Address
- Secondary E-mail Add
- Biography
- Birth Date
- Gender
- Country
- Google+
- Skype ID
- Viber number
- WhatsApp number
- Telegram
- Discord
- YouTube
- SoundCloud
- VKontakte
- Roles (Dropdown)
- Roles (Radio)
- Languages
- Phone Number
- Mobile Number
- User Rating
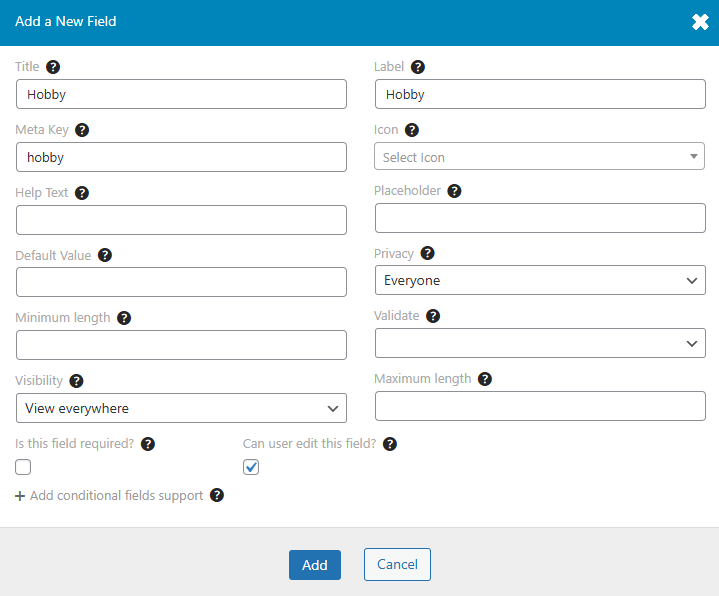
How to Add a Text Box Field
- In your WordPress dashboard, go to Ultimate Member > Forms.
- Find the form named “Default Profile” and click the Edit button under it.
- Inside the form builder, click the + (plus) button to add a new field.
- From the list of field types, click on “Text Box”.
- In the settings that appear, type a title for your text box (for example: “Hobby” or “Nickname”).
- Click the Add button to insert the text box field into your form.
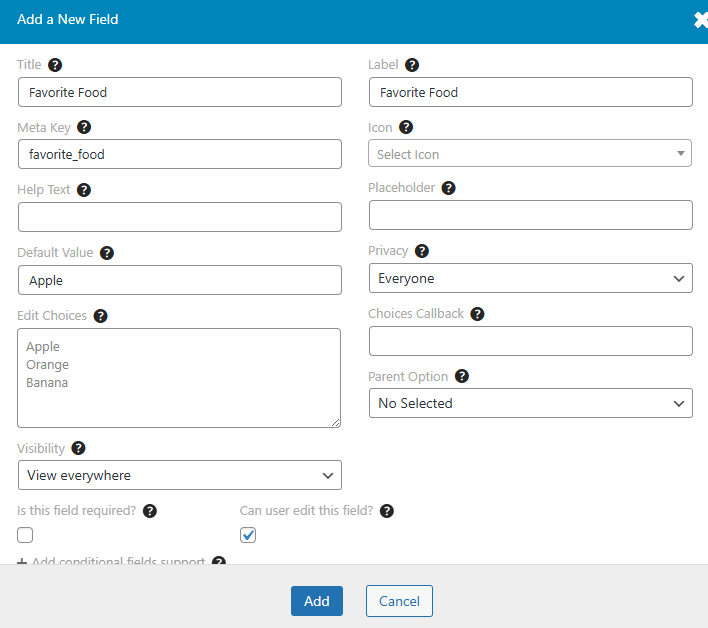
How to Add a Dropdown Field
- In your WordPress dashboard, go to Ultimate Member > Forms.
- Find the form called “Default Profile” and click the Edit link under it.
- In the form builder, click the + (plus) button to add a new field.
- From the list that appears, click on “Dropdown” to choose that field type.
- In the field settings:
Title: Type a title for your dropdown (for example: “Favorite Food”).
Label: Field label, will appear on the front end.
Meta Key: write the meta key in lowercase with underscore (for example: favorite_food)
Default Value: If you want one option selected by default, type it in the Default Value box.
- In the Edit Choices box: Type each dropdown option on a new line (do not use commas).
Example:
Apple
Orange
Banana
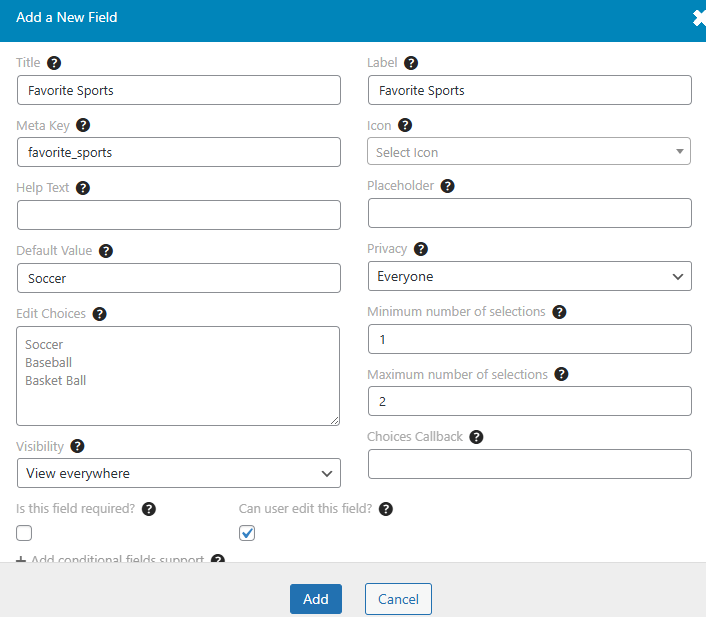
How to Add a Multi-Select Field
- In your WordPress dashboard, go to Ultimate Member > Forms.
- Find the form called “Default Profile” and click the Edit link under it.
- In the form builder, click the + (plus) button to add a new field.
- From the list that appears, click on “Multi Select” to choose that field type.
- In the field settings:
Title: Type a title for your Multi Select (for example: “Favorite Sports”).
Label: Field label, will appear on the front end
Meta Key: write the meta key in lowercase with underscore (for example: favorite_sports)
Default Value: If you want one option selected by default, type it in the Default Value box.
- In the Edit Choices box: Type each dropdown option on a new line (do not use commas).
Example:
Soccer
Baseball
Basket Ball
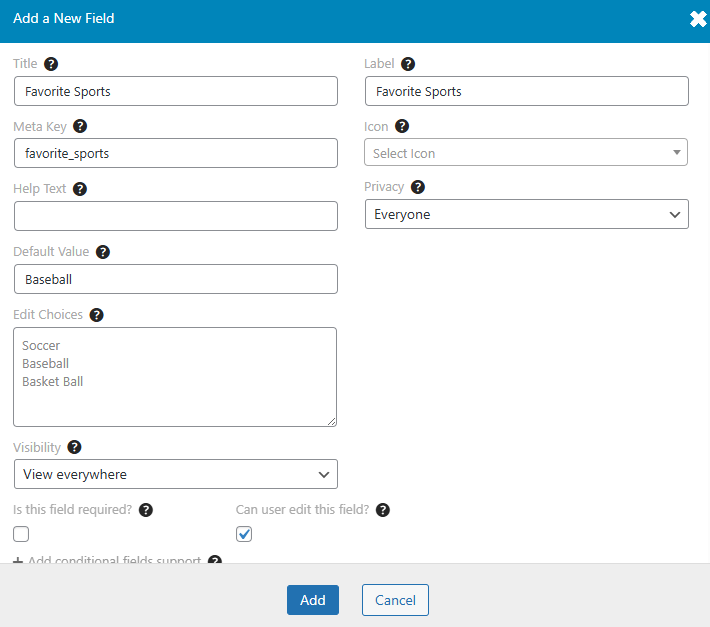
How to Add a Radio Field
- In your WordPress dashboard, go to Ultimate Member > Forms.
- Find the form called “Default Profile” and click the Edit link under it.
- In the form builder, click the + (plus) button to add a new field.
- From the list that appears, click on “Radio” to choose that field type.
- In the field settings:
Title: Type a title for your Multi Select (for example: “Favorite Sports”).
Label: Field label, will appear on the front end
Meta Key: write the meta key in lowercase with underscore (for example: favorite_sports)
Default Value: If you want one option selected by default, type it in the Default Value box.
- In the Edit Choices box: Type each dropdown option on a new line (do not use commas).
Example:
Soccer
Baseball
Basket Ball
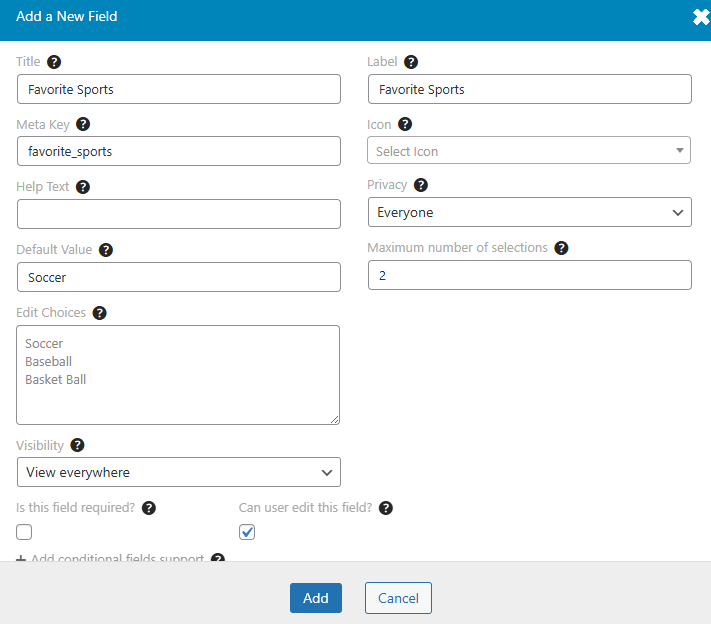
How to Add a Checkbox Field
- In your WordPress dashboard, go to Ultimate Member > Forms.
- Find the form called “Default Profile” and click the Edit link under it.
- In the form builder, click the + (plus) button to add a new field.
- From the list that appears, click on “Checkbox” to choose that field type.
- In the field settings:
Title: Type a title for your Multi Select (for example: “Favorite Sports”).
Label: Field label, will appear on the front end
Meta Key: write the meta key in lowercase with underscore (for example: favorite_sports)
Default Value: If you want one or more options selected by default, type them here (must match the text of one of your options).
Maximum number of selections: Enter the number of options a user is allowed to choose.
- In the Edit Choices box: Type each dropdown option on a new line (do not use commas).
Example:
Soccer
Baseball
Basket Ball
How to Add an Image Upload Field
- In your WordPress dashboard, go to Ultimate Member > Forms.
- Find the form called “Default Profile” and click the Edit link under it.
- In the form builder, click the + (plus) button to add a new field.
- From the list that appears, click on “Image Upload” to choose that field type.
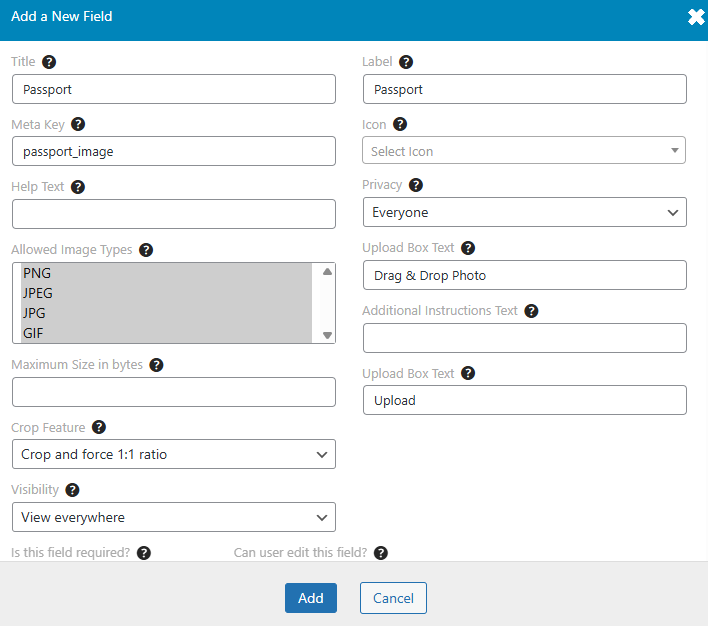
- In the field settings:
Title: Give the field a name (e.g., “Passport Picture” or “Upload ID”).
Label: This is the text users will see next to the field. It can be the same as the title.
Meta Key: Write a short, unique name in lowercase using underscores (e.g., passport_image). This is how the data is saved.
Allowed Image Types: Choose which image formats to allow (e.g., PNG, JPG, JPEG, GIF). You can allow one or multiple formats.
Maximum Size (in bytes): You can limit the file size (e.g., 1000000 for 1MB). Leave this blank if you don’t want a limit.
Crop Feature: By default, cropping is turned off. Turn it on if you want users to crop their uploaded images.
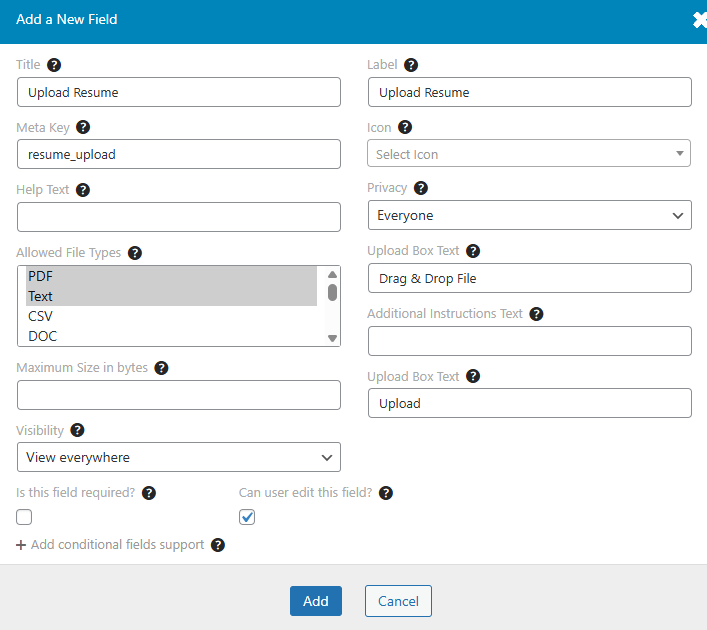
How to Add an File Upload Field
- In your WordPress dashboard, go to Ultimate Member > Forms.
- Find the form called “Default Profile” and click the Edit link under it.
- In the form builder, click the + (plus) button to add a new field.
- From the list that appears, click on “File Upload” to choose that field type.
- In the field settings:
Title: Give the field a name (e.g., “Upload Resume” or “Submit ID Proof”).
Label: This is the text users will see next to the field. It can be the same as the title.
Meta Key: Write a short, unique name in lowercase using underscores (e.g., resume_upload). This is how the data is saved.
Allowed Image Types: Choose which file types users can upload. Common options include:
You can allow one type or multiple.
- Documents: PDF, DOC, DOCX, TXT, CSV, ODT, ODS, XLS, XLSX
- Images: JPG, JPEG, PNG, GIF, EPS, PSD, TIF, TIFF
- Other: ZIP, RAR, MP3
Maximum Size (in bytes): You can limit the file size (e.g., 1000000 for 1MB). Leave this blank if you don’t want a limit.